Getting Started with DanceXR
Welcome! This guide walks you through your first DanceXR experience, from downloading the app to loading a model and playing a motion. If you’re new to DanceXR, don’t worry: it is designed to be intuitive and user-friendly.
1. Download and Install
DanceXR is available on PC (Windows/Mac), Android, iOS, and Meta Quest. Visit the download page to get the right version for your platform:
Here’s a quick overview of what’s available:
| Platform | Recommended Build |
|---|---|
| Windows PC | Choose HD for balanced quality, RT for ray tracing, or LW for performance |
| Mac | HD build — available on Steam, but it has not been updated recently due to the smaller user base. |
| Android | LW build — available on Google Play or Itch.io |
| iOS | App Store |
| Meta Quest | Standalone build — available on Itch.io |
Installation tips:
- Windows: Extract the downloaded
.7zarchive to any folder, then runDanceXR.exe. - Mac: Install through Steam.
- Android / Quest: Install the APK from your download source.
- iOS: Install directly from the App Store.
On first launch, complete the activation process if required. Steam and Google Play activate automatically; other paid editions need a quick one-time activation. See the Activation & Licensing guide for the full walkthrough.
If you run into any issues at launch, check the Support page for common fixes.
2. Prepare Your Content Library
We recommend preparing your content library before launching DanceXR, but you can also load content by dropping model and motion files directly onto the DanceXR window. You can skip this step for now and come back when you’re ready to add your own models and motions. Keep in mind that the drag and drop only works for models and motions, for other content like stages, sky maps and textures, you still need to put them in the content library.
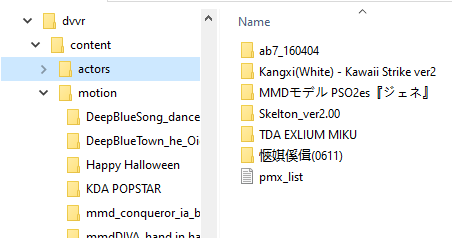
DanceXR looks for models, motions, and other content inside a content library folder. This is where you’ll copy your PMX and XPS model files.
The location depends on your platform:
- Windows: Open DanceXR, click the gear icon (system menu) on the bottom left, then select “Show in Explorer” under Content Library.
- Android / Quest: After the 2024.3 update, the folder is at
/DanceXR/on your storage. - iOS: Look for a “DanceXR” folder in your device’s Files app.
For a full breakdown of the folder structure and supported formats, see the Content Library guide.
3. Basic UI and Controls
When you open DanceXR, you should see a menu bar at the bottom of the screen. If not, click empty space to cycle UI states until it appears. In VR, the UI floats in front of you. In desktop mode, it is anchored to the bottom of the screen. Click and drag actions work the same whether you use a mouse or VR controllers. In VR, you can move the UI by holding the grip button and dragging it with your hand.
Components of the UI

- Progress bar: At the bottom. It displays the current motion or audio name and progress. Click to play or pause, or drag to scrub.
- Menu section: Five icons on the left.
- system menu (gear): General settings, content library, and support links
- environment menu (picture): Change the stage, skybox, lighting, and camera settings
- scene menu (stage): Load stages and props, and save or load your scene setup
- audio/motion menu (music note): Load and assign motions and audio files
- actor menu (person): Load and manage character models
- Playback and Chat Controls: Volume slider, playlist, previous/next buttons, and AI chat toggle on the right.
Scene controls
Loaded actors have a yellow circle around their feet.
- Click the circle to open the actor menu
- Drag to move the actor around the stage
- While dragging, use the mouse wheel to rotate the actor
Toggle states
Click on empty space to toggle between these modes:
- UI mode: All menus and controls are visible.
- Control mode: Menus are hidden but actor circles are visible.
- Immersive mode: All menus and circles are hidden for the most immersive experience.
4. Load a Model
Not in the content library yet?
No problem. You can load models on the fly by dragging and dropping files directly onto the DanceXR window. Supported formats include .pmx, .xps, .mesh, .mesh.ascii, and .fbx (preview, since 2025.9 — model only, no animations). Just drop the file, and it will appear in the actor menu.
Within the content library
Click the actor icon and select “Load Model.” You should see a list of all models in the actors folder. By default, the new model replaces the currently selected one on stage. To add instead of replace, click the “+” icon next to the model name. This option is available in paid versions.
5. Load a VMD Motion
Drag and drop
Drag an audio file onto the DanceXR window to load it immediately. WAV and OGG formats are supported. Drag a motion file in VMD or BVH format onto the DanceXR window to load it. The motion is assigned to the currently selected actor if they do not already have one assigned.
Content library
Click the audio/motion icon and select “Load Audio / Motion.” You should see a list of all motions in the motions folder.
Motion and audio are automatically grouped as “dance sets.” Once loaded, you should see the audio name in the progress bar and the motions in the dance menu. To assign a motion, select it and choose “Assign To,” or open the actor menu and choose one of the loaded motions.
For more details on organizing motion files, see the Content Library guide.
What’s Next?
You’re up and running! Start with these guides — each one is a hub that links out to the detailed pages:
Learn the system
- Concepts & glossary — Terms used across the docs (actor, dance set, gizmo cube, dressing system, Operator)
- Controls & UI — Toggle states, selection disc, gizmo cubes, input mappings
- VR operations — Hand controllers, pointer, comfort, Mouse-in-VR
Work with content
- Working with actors — Loading, configuring, and managing characters
- Appearance & materials — Dressing, textures, materials, body paint
- Physics system — Hair, cloth, breast, soft body, ragdoll
- Motion system — Dance sets, procedural dance, layering, override
- Cinematic cameras — When to use which camera mode
Browse and reference
- Features overview — Every feature in DanceXR, by section
- AI in DanceXR — Operator, AI Voice Chat, Discovery, Auto Dance
- Content library — Organizing models, motions, stages, presets
- Creator edition — Offline 4K / VR rendering
Get help
- FAQ — Quick answers to common questions
- Troubleshooting — Logs, common fixes, bug reports
- Support — Discord, email, GitHub issues
Enjoy exploring DanceXR!